
.jpg)
Have you ever struggled to untangle a ball of necklaces stuck together? If you have, you are not the only one my friend. This tutorial will provide a great way to make a DIY jewelry holder to solve your necklace nightmares!
I already had some wooden frames that I bought at garage sales that were collecting dust. My plan was to use one of my larger 16 x 20 frames for this project as a starting point. I headed to Hobby Lobby (with all 3 of my kids). Yes, I take them everywhere...and it's not easy. As I combed thru the store searching and trying to figure out what I wanted to do, I came across a pre-made jewelry holder. I was so tempted to buy it, but I didn't. So I ended up not finding anything that worked for my project there.
Next stop, was Home Depot (a home improvement store) to find decorative metal sheets. I saw the idea on HGTV where designers use these decorative metal sheets to inlay in cabinet doors or radiator covers. There were also ideas on Pinterest that I had seen using metal sheets as well. So again with my 3 little sidekicks, we searched for these metal sheets. (Keep in mind when shopping with my kids, someone ALWAYS has to use the restroom. So a quick trip to the store, is never quick!) We finally found them after asking about 3 different associates. They had 2 different sizes and I didn't pre-measure the frame before I left the house. They have different finishes and patterns to choose from as well. I bought the smaller size sheet thinking this would work. When I got home ready to start working on this project, the width of the metal sheet was too short. After my exhausting shopping day, the last thing I want to do is think about going back to the store to return something. Thankfully I had a smaller 9 x 12 frame that I decided to use instead.
List of supplies that I used:
-Wooden 9 x 12 Frame (Garage sale find)
-Decorative Metal Sheet (Home Depot)
-Small Metal Hooks
-Small "S" hooks
-Small "S" hooks
-Acrylic Paint/Paintbrush (I mixed several colors to make the turquoise, but any color you prefer)
-Clear Acrylic Spray Sealer
-Clear Acrylic Spray Sealer
-Sandpaper
-Blue Painters tape (you may not need this if you are painting the entire frame)
-Blue Painters tape (you may not need this if you are painting the entire frame)
-Pliers
-Measuring tape
-Hammer
-Staple gun/staples
-Wire Cutters (I started to use, but ended up not really needing these...I'll explain later)
-Wire Cutters (I started to use, but ended up not really needing these...I'll explain later)
Step 1: Take wooden frame and lightly sand the entire frame to remove finish to help paint adhere

Step 2: Measure where you want to place the bottom hooks. I started from the middle and measured outward. Once I decided where I wanted to place my hooks I made tiny holes to mark each place. I screwed the hooks by hand and just twisted them into the wood. I didn't tighten them all the way in the wood at this point.


Step 4: Paint the entire frame with acrylic paint.

.jpg)

Step 6: Measure the decorative metal sheet for the amount needed to fit inside the frame with a little extra to allow for staples. Since the frame was 9 x 12, the width of the metal was already 12" so luckily I just needed to make one cut. I started to use wire cutters but it got pretty sharp as I cut towards the middle. (So I thought to myself, do I risk cutting myself for all this?!) Then I thought of a good idea, if I bend metal enough...it will eventually break. My plan worked and the metal snapped in half where I had bent the sheet back and forth.
.jpg)
Step 7: Using pliers and a hammer, bend the metal to fit inside the frame for a snug fit. Then use a staple gun to secure the metal sheet to the backside of the wooden frame. You may have to use the hammer like I did, to get those finicky staples more secure.
.jpg)
Step 8: Screw the small bottom hooks back into the holes you had already made. Lightly Sand the edges and corners of the frame with sandpaper to rough up the edges. I like the look of worn chipped off paint. Then sit back and admire your handy work! :)


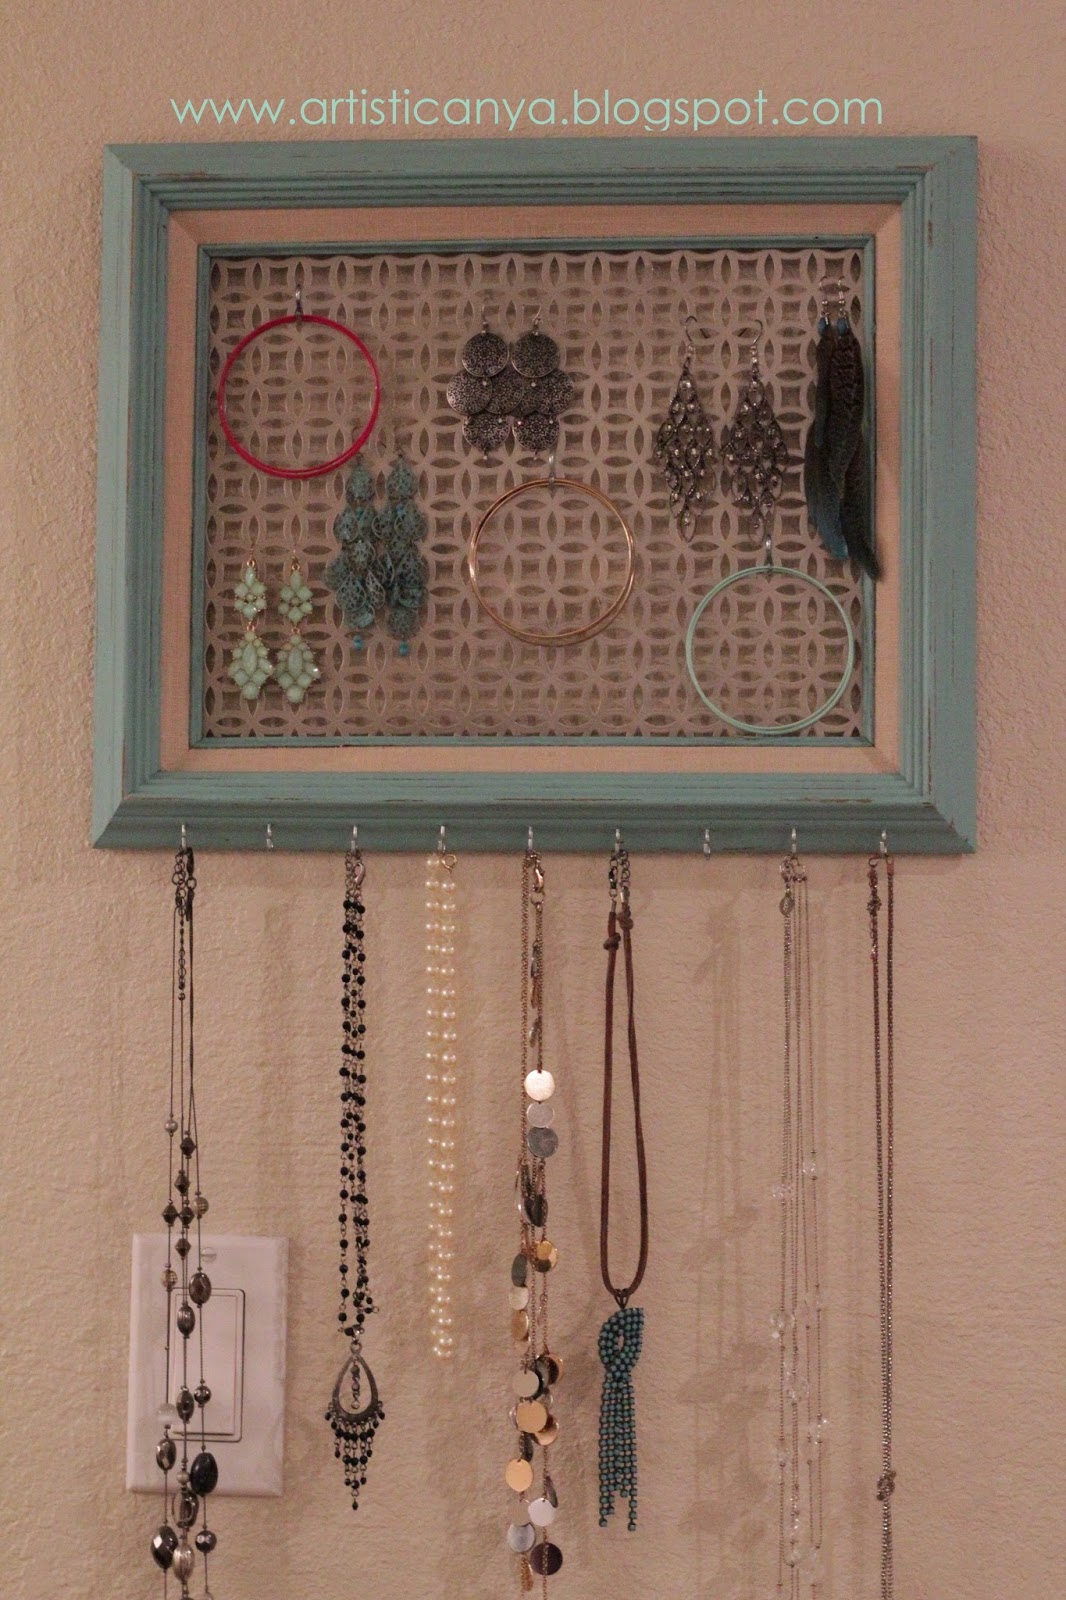
I was pretty proud of myself after doubting my ability to do this project! I hung it up right away to test it out. Using the small "S" hooks, you can hang bracelets. and the bottom hooks were perfect for hanging necklaces.
.jpg)
Brandi really wanted a solution to her problem of tangled necklaces she battled with each morning while getting ready for work. So now she got her birthday wish which solved her problem (she loved it!) and I gained a bit more confidence in my carpentry skills! Birthday gifts should be made with love or come from the heart, and this certainly was a gift both her and I will remember and cherish!
This comment has been removed by the author.
ReplyDelete